Lightning Web Component(LWC) Setup and Example Component
Lightning Web Component(LWC) is a new framework for building Lightning Components.
In this post, we are going to learn how to setup SalesforceDX and VsCode in order to create Lightning Web Components.
Step 1: Sign up for Salesforce pre-release developer org.
https://www.salesforce.com/form/signup/prerelease-spring19/
Step 2: Add a custom domain name to your salesforce URL.
a) From setup enter the MyDomain in the Quick Find Box.
b)Complete the four steps.

Step 3: Download and install CLI.
a) Windows 64 bit: https://sfdc.co/sfdx_cli_win64
macOS: https://sfdc.co/sfdx_cli_osx
b) Just check which version is installed for your CLI using this command sfdc version

c) Upgrade to the pre-release version of the CLI by running this command
sfdx plugins:install salesforcedx@pre-release
Step 4: Install Visual Studio Code.
https://code.visualstudio.com/download
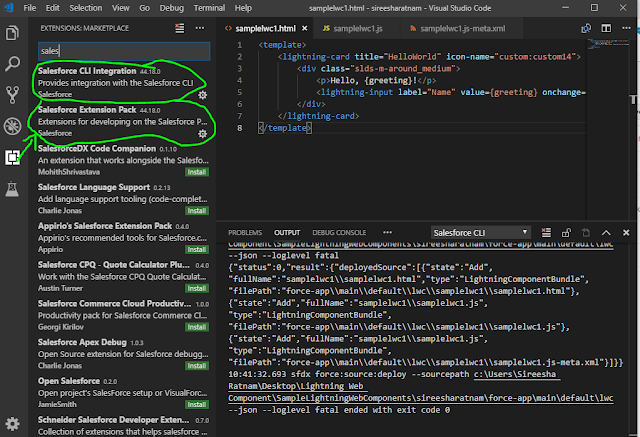
Step 5: Install all the required extensions in Visual Studio Code. Fllowing is the required extensions.
a)Salesforce CLI Integration.
b)Salesforce Extension Pack.
c)Lightning Web Components.

Step 6: Use Ctrl+Shift+p to create a project in visual studio code and select create a project with
manifest

Step 7: Authorize your pre-release developer org. Use Ctrl+Shift+p and select Authorize an Org.
Step 8: Use Ctrl+Shift+p and Create a Lightning Web Component and use the following code.
SampleLwC1.html:
SampleLwC1.js:
SampleLwC1.js_meta.xml:
Step 9: Execute the code. Right click on a folder and select Deploy source to Org

Step 10: Go to any record detail page and click on Edit Page and Drag and Drop your Lightning Web Component on Page.


In this post, we are going to learn how to setup SalesforceDX and VsCode in order to create Lightning Web Components.
Step 1: Sign up for Salesforce pre-release developer org.
https://www.salesforce.com/form/signup/prerelease-spring19/
Step 2: Add a custom domain name to your salesforce URL.
a) From setup enter the MyDomain in the Quick Find Box.
b)Complete the four steps.

Step 3: Download and install CLI.
a) Windows 64 bit: https://sfdc.co/sfdx_cli_win64
macOS: https://sfdc.co/sfdx_cli_osx
b) Just check which version is installed for your CLI using this command sfdc version

c) Upgrade to the pre-release version of the CLI by running this command
sfdx plugins:install salesforcedx@pre-release
Step 4: Install Visual Studio Code.
https://code.visualstudio.com/download
Step 5: Install all the required extensions in Visual Studio Code. Fllowing is the required extensions.
a)Salesforce CLI Integration.
b)Salesforce Extension Pack.
c)Lightning Web Components.


Step 6: Use Ctrl+Shift+p to create a project in visual studio code and select create a project with
manifest

Step 7: Authorize your pre-release developer org. Use Ctrl+Shift+p and select Authorize an Org.
Step 8: Use Ctrl+Shift+p and Create a Lightning Web Component and use the following code.
SampleLwC1.html:
<template>
<lightning-card title="HelloSireeshaRatnam" icon-name="custom:custom14">
<div class="slds-m-around_medium">
<p>Hello, {greeting}!</p>
<lightning-input label="Name" value={greeting} onchange={changeHandler}></lightning-input>
</div>
</lightning-card>
</template>
SampleLwC1.js:
import { LightningElement, track } from 'lwc';
export default class HelloWorld extends LightningElement {
@track greeting = 'Sireesha Ratnam';
changeHandler(event) {
this.greeting = event.target.value;
}
}
SampleLwC1.js_meta.xml:
<?xml version="1.0" encoding="UTF-8"?>
<LightningComponentBundle xmlns="http://soap.sforce.com/2006/04/metadata" fqn="helloWorld">
<apiVersion>45.0</apiVersion>
<isExposed>true</isExposed>
<targets>
<target>lightning__AppPage</target>
<target>lightning__RecordPage</target>
<target>lightning__HomePage</target>
</targets>
</LightningComponentBundle>
Step 9: Execute the code. Right click on a folder and select Deploy source to Org

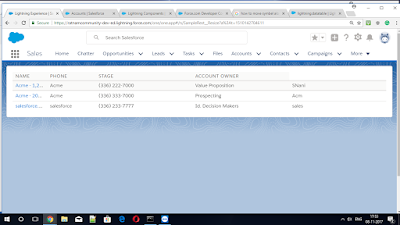
Step 10: Go to any record detail page and click on Edit Page and Drag and Drop your Lightning Web Component on Page.

OutPut:


hey there, nice article on lightning web component. we have a similar blog on Enhanced Performance with Lightning Web Components
ReplyDeletecheck it out and give us a feedback. also you can check my blog Evaluate Sales Performance with Territory Management